
How to Post an Article to Your Hotfrog Listing
Log into your Admin Panel
Once you log into your account dashboard, you will see your options menu listed down the left-hand side of your screen.
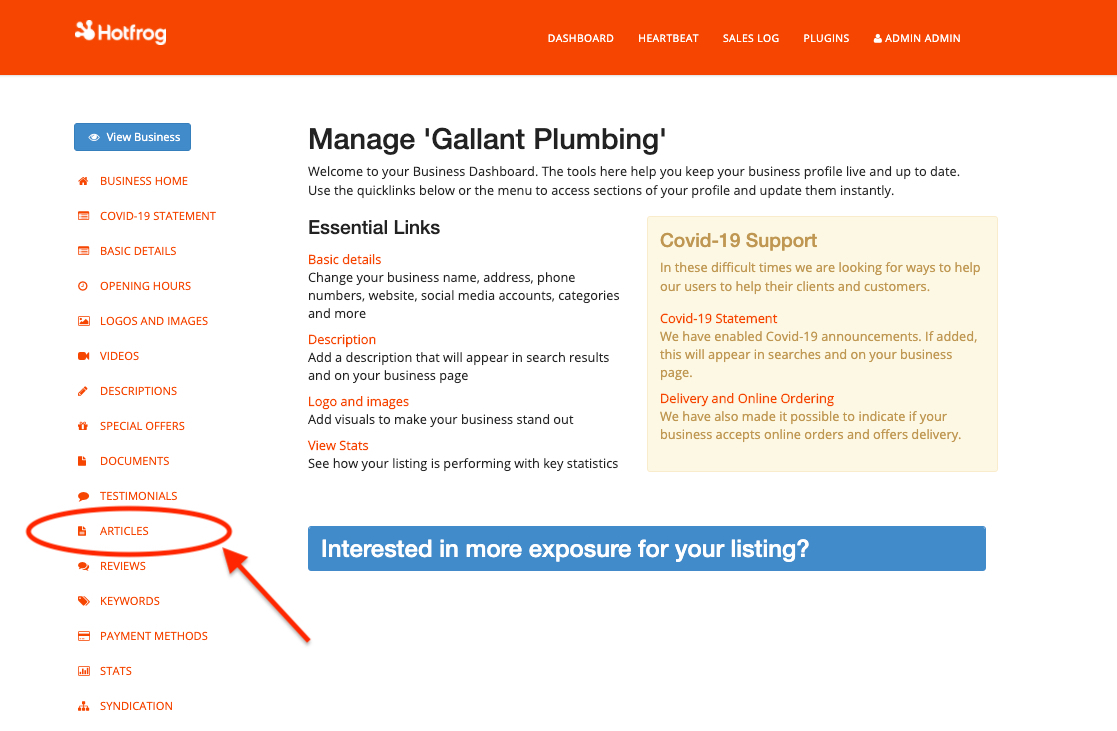
You will see ‘Articles’ below Testimonials and above Reviews – click on ‘Articles’
Add Your Article
Once on the Articles screen, you simply add a title for your article, such as ‘Why Dealing My Company Is So Great’
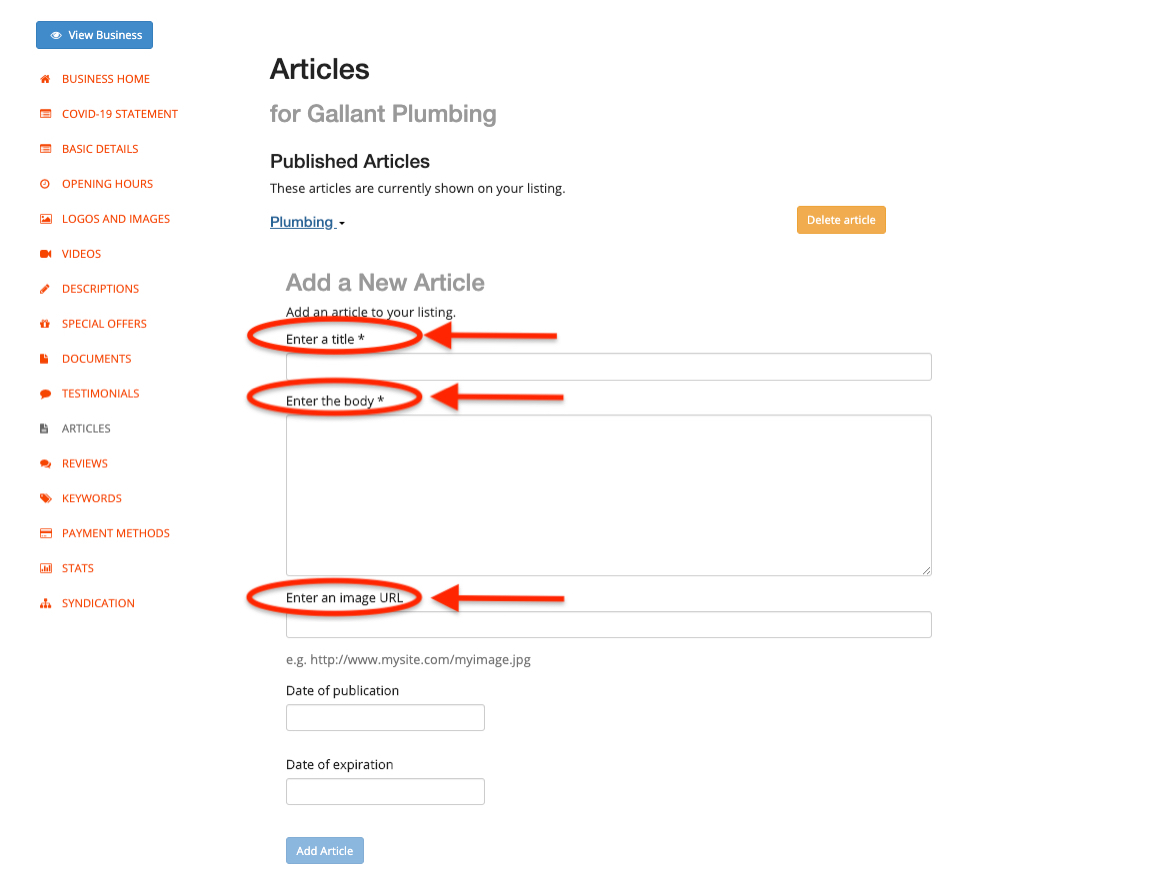
Once you have your title, you can add the body of the article where it says, ‘Enter the Body’. You can then add an image if you wish and then add the date that the article is published.
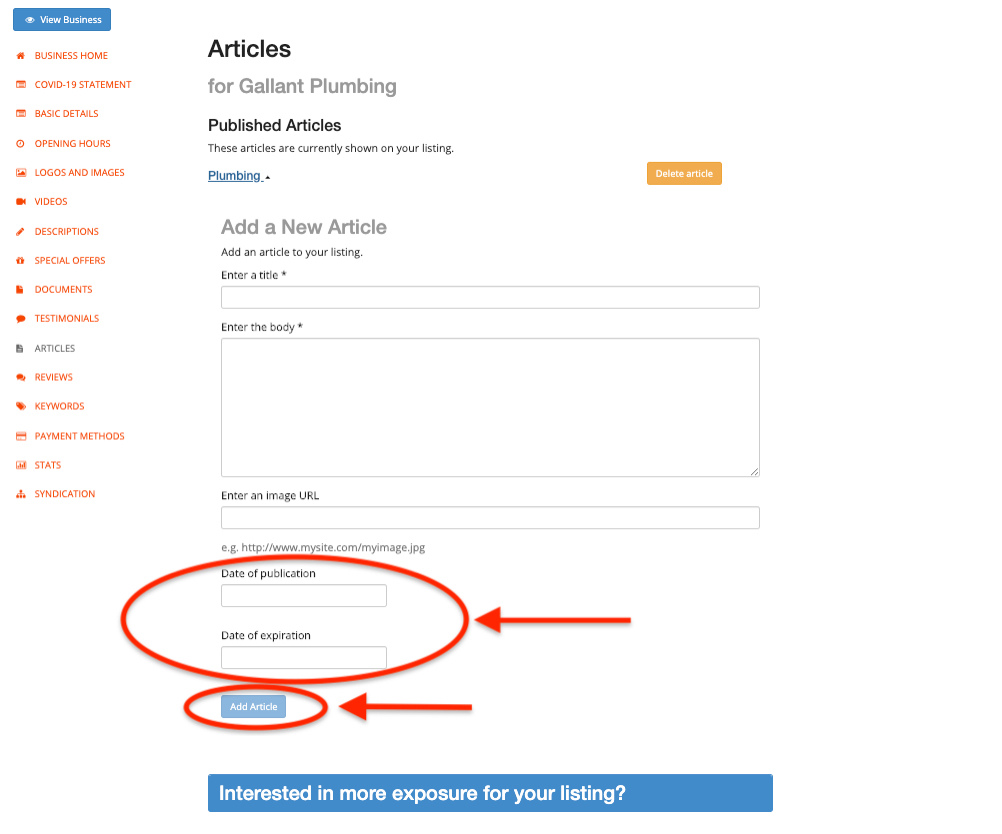
If you want to have the article expire, say in six or twelve months time, you can add an expiry date and your article will be removed from your listing on that date.
Once you are happy, simply click on ‘Add Article’ and it will be added to your listing.
Review Your Article
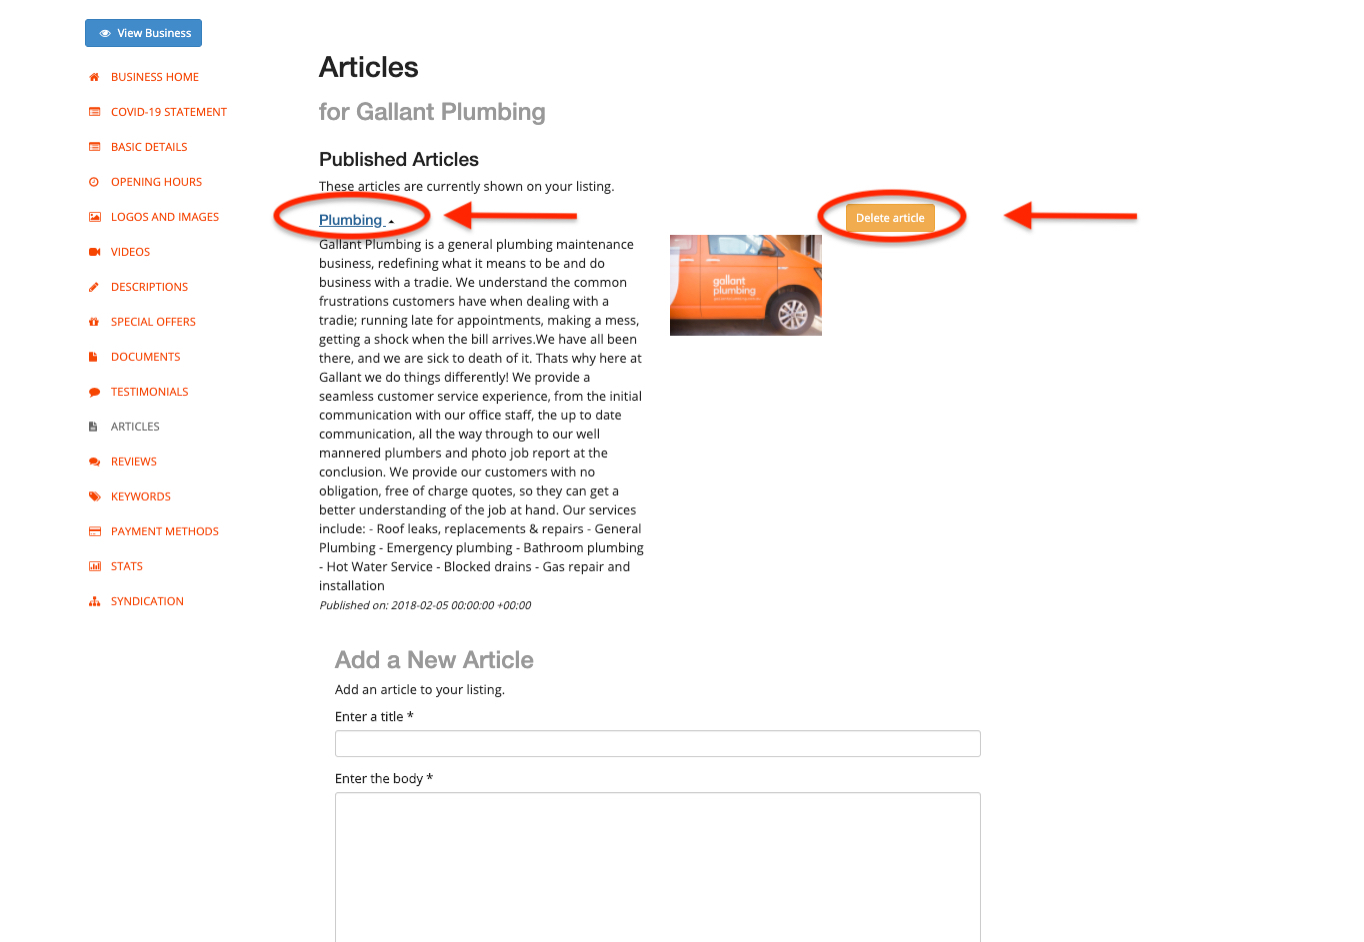
In our example here, you will see that there is an article already published, these can be accessed by clicking on the relevant article here. You can delete your article at any time if you so wish by clicking on ‘Delete Article’
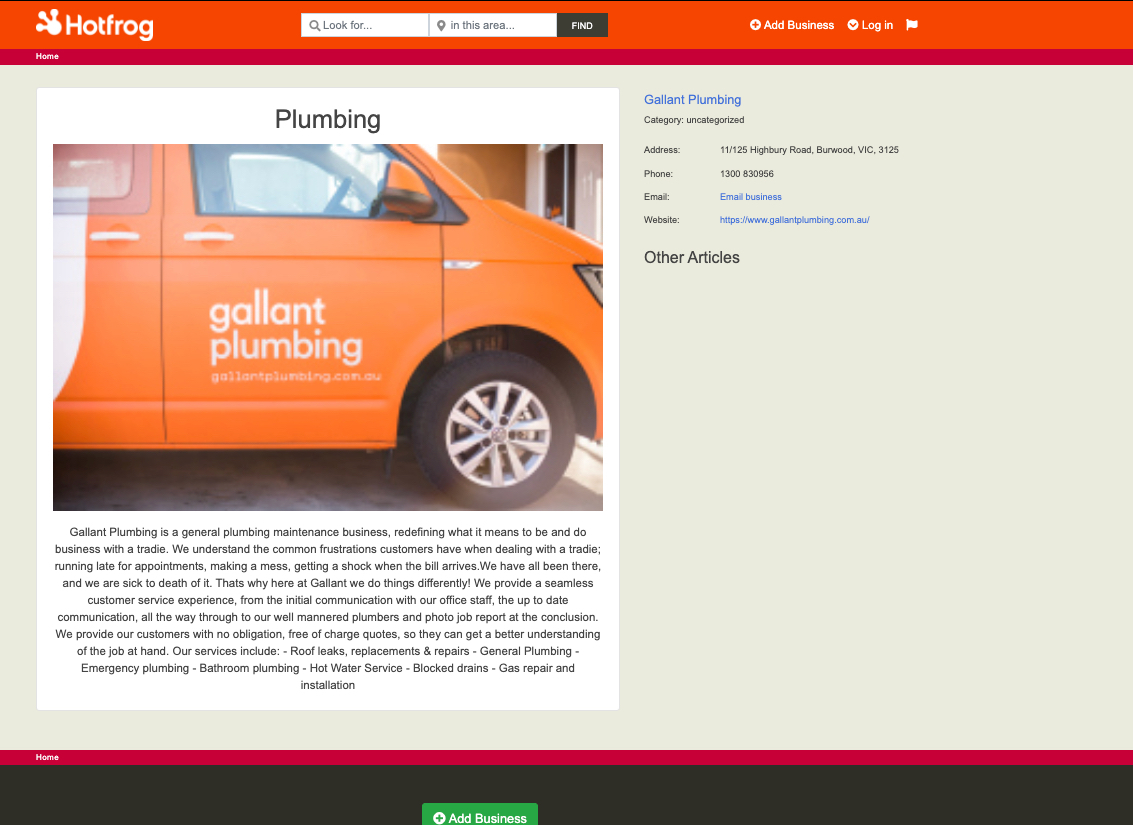
View Your Live Article
You are able to view your published article on you listing on the right hand rail of your screen, below is an example.
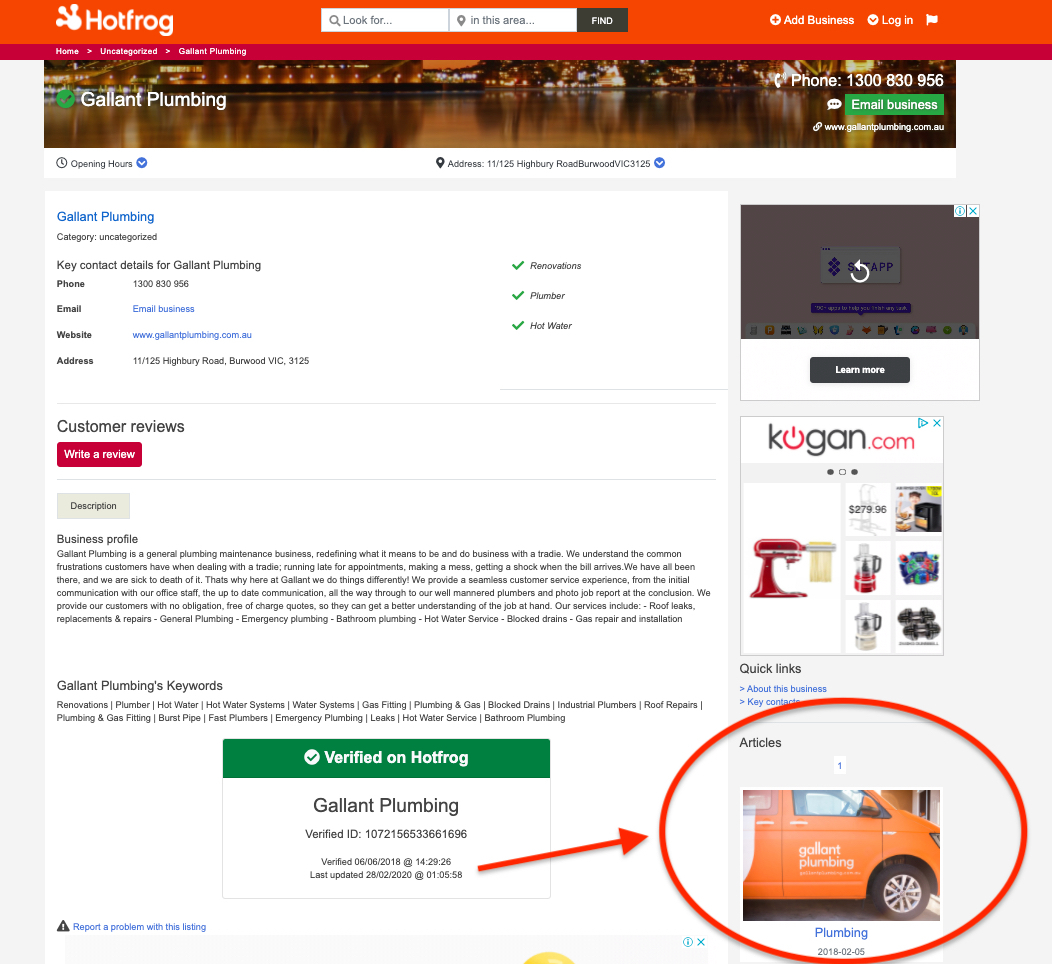
To read the published live version, simply click on the title to open the article.
If you have any questions or need some assistance with publishing your articles please reach out to us at [email protected] and we will help you out.